Imagine coming home after a long day, only to find your garage door stuck halfway open. Frustrating, right? Replacing garage door cables might seem intimidating, but with the right guidance, it’s a project you can confidently tackle yourself. This comprehensive guide will help you understand the essential role of garage door cables and walk you through the steps to replace them safely and efficiently.
We’ll go into the basics of garage door cables, ensuring you have a solid understanding before starting the replacement process. Detailed, step-by-step instructions will be provided, covering systems that use both torsion and extension springs. Whether you’re a seasoned DIYer or a beginner, our guide is designed to make the task straightforward and manageable.
By the end of this guide, you’ll be equipped with the knowledge and confidence to restore your garage door to smooth and reliable operation. Say goodbye to the hassle of a malfunctioning garage door and hello to the satisfaction of a job well done.

Understanding the Role of Garage Door Cables
Garage door cables are essential components of your garage door system, ensuring smooth and balanced operation. These cables work with the springs to lift and lower your garage door. Properly functioning cables are crucial for maintaining their safety and functionality.
Identifying a Broken Garage Door Cable
Knowing the signs of a broken garage door cable can save you from accidents and further damage to your garage door system. Common indicators of a broken cable include:
- Visual Inspection:
- Frayed Cables: Garage door cables can become frayed over time due to regular wear and tear. Fraying is typically visible along the length of the cable and indicates that the cable is weakening and may soon break.
- Rusted Cables: Rust forms when the cable’s metal is exposed to moisture. Rust weakens the cable and can lead to breakage. Inspect the wires closely for any signs of rust, which appear as reddish-brown patches.
- Snapped Cables: A broken or snapped cable is an obvious sign of failure. If you see a cable hanging loosely or entirely detached, it’s a clear indication that it has snapped and needs immediate replacement.
- Frayed Cables: Garage door cables can become frayed over time due to regular wear and tear. Fraying is typically visible along the length of the cable and indicates that the cable is weakening and may soon break.
- Door Misalignment:
- Uneven Door: When a garage door cable breaks, it can cause one side of the door to be unsupported, leading to an uneven appearance. This imbalance occurs because the cable no longer maintains the tension on one side.
- Crooked Door: A broken cable can make the door appear crooked. One side may hang lower than the other, or the door might not sit flush against the ground when closed.
- Gaps and Uneven Movement: You may notice gaps at the bottom of the door or uneven movement when the door is operated, indicating that the door is not aligned properly due to a broken cable.
- Uneven Door: When a garage door cable breaks, it can cause one side of the door to be unsupported, leading to an uneven appearance. This imbalance occurs because the cable no longer maintains the tension on one side.
- Operational Issues:
- Difficulty in Operation: A broken garage door cable can make the door difficult to open or close. You might experience resistance or find the door not moving smoothly along its tracks.
- Unusual Noises: Listen for unusual noises during operation, such as squeaking, grinding, or snapping sounds. These noises can be caused by a broken or frayed cable rubbing against other components.
- Stuck Door: A broken cable could be the culprit if the garage door becomes stuck halfway or does not open or close fully. The door relies on the cables for balanced movement, and a broken cable disrupts this balance.
- Difficulty in Operation: A broken garage door cable can make the door difficult to open or close. You might experience resistance or find the door not moving smoothly along its tracks.
Assessing the Scope of DIY Garage Door Cable Replacement
Replacing garage door cables can be a DIY project if you have the right tools and follow safety guidelines. Consider the following before starting:
- Skill Level:
- Basic Mechanical Skills: Ensure you have basic mechanical skills and are comfortable working with tools. Understanding the mechanics of the garage door system is crucial for a successful DIY replacement.
- Familiarity with Garage Door Systems: Familiarize yourself with the various components of the garage door system, including cables, springs, pulleys, and tracks. Knowing how these parts interact will help you troubleshoot and replace the cables effectively.
- Basic Mechanical Skills: Ensure you have basic mechanical skills and are comfortable working with tools. Understanding the mechanics of the garage door system is crucial for a successful DIY replacement.
- Tools Required:
- Wrenches: Different sizes of wrenches are necessary for loosening and tightening bolts and nuts.
- Pliers: Pliers are essential for gripping, pulling, and securing cables during replacement.
- Sturdy Ladder: To reach high components of the garage door system safely, a stable ladder is needed. Ensure the ladder is positioned on a flat, stable surface.
- Wrenches: Different sizes of wrenches are necessary for loosening and tightening bolts and nuts.
- Safety Precautions:
- Protective Gear: Always wear safety glasses and gloves to protect your eyes and hands from injury. Cables can snap with significant force, and sharp edges can cause cuts.
- Door Support: Before starting the replacement, ensure the garage door is securely supported to prevent accidental closing. Use locking pliers or clamps to hold the door in place.
- Disconnect Power: If your garage door is connected to an automatic opener, disconnect the power to prevent accidental activation while working on the door.
- Protective Gear: Always wear safety glasses and gloves to protect your eyes and hands from injury. Cables can snap with significant force, and sharp edges can cause cuts.
Determining the Need for Professional Assistance
While DIY projects can be rewarding, some situations warrant professional intervention:
- Complex Repairs:
- Extensive Disassembly: If replacing the cable requires extensive disassembly of the garage door system or if other components such as springs or pulleys are damaged, it is best to seek professional help. Professionals have the expertise and tools to handle complex repairs safely.
- Spring Tension: Garage door springs are under high tension and can be dangerous to handle without proper knowledge and tools. If the cable replacement involves adjusting or replacing springs, contact a professional to avoid serious injury.
- Extensive Disassembly: If replacing the cable requires extensive disassembly of the garage door system or if other components such as springs or pulleys are damaged, it is best to seek professional help. Professionals have the expertise and tools to handle complex repairs safely.
- Lack of Tools or Experience:
- Tool Availability: If you need the necessary tools or are unsure how to use them correctly, hiring a professional is safer. Proper tools are essential for completing the job efficiently and safely.
- Experience: If you are unsure about your ability to complete the task safely or need more experience working with mechanical systems, a professional can ensure the job is done correctly and safely.
- Tool Availability: If you need the necessary tools or are unsure how to use them correctly, hiring a professional is safer. Proper tools are essential for completing the job efficiently and safely.
- Warranty Considerations:
- Manufacturer Warranties: Some garage door systems come with warranties that require professional service to remain valid. Check your warranty terms before attempting a DIY repair.
- Insurance Requirements: Home insurance policies may sometimes require professional repairs to cover any potential damages. Ensure you comply with these requirements to avoid voiding your coverage.
- Manufacturer Warranties: Some garage door systems come with warranties that require professional service to remain valid. Check your warranty terms before attempting a DIY repair.
Step-by-Step Instructions for Replacing Garage Door Cables
Once you’ve determined that cable replacement is necessary and have the requisite skills and tools, follow these detailed instructions to replace your garage door cables.
Replacing a Torsion Spring Lifting Cable
Disconnect the Opener: Remove the opener from being plugged in to make sure it won’t open accidentally. This step is crucial for your safety as it ensures the door does not move unexpectedly while you are working.
Secure the Door: Use locking pliers or C-clamps to hold the door in place. Position these tools on the track just below the bottom rollers to keep the door stable and prevent it from falling or moving during the repair process.
Release Tension: Carefully unwind the torsion springs using winding bars. Insert the bars into the spring’s winding cone, ensuring a firm grip, and slowly turn the bars to release the tension. This step must be done cautiously to avoid sudden tension releases, which can be dangerous.
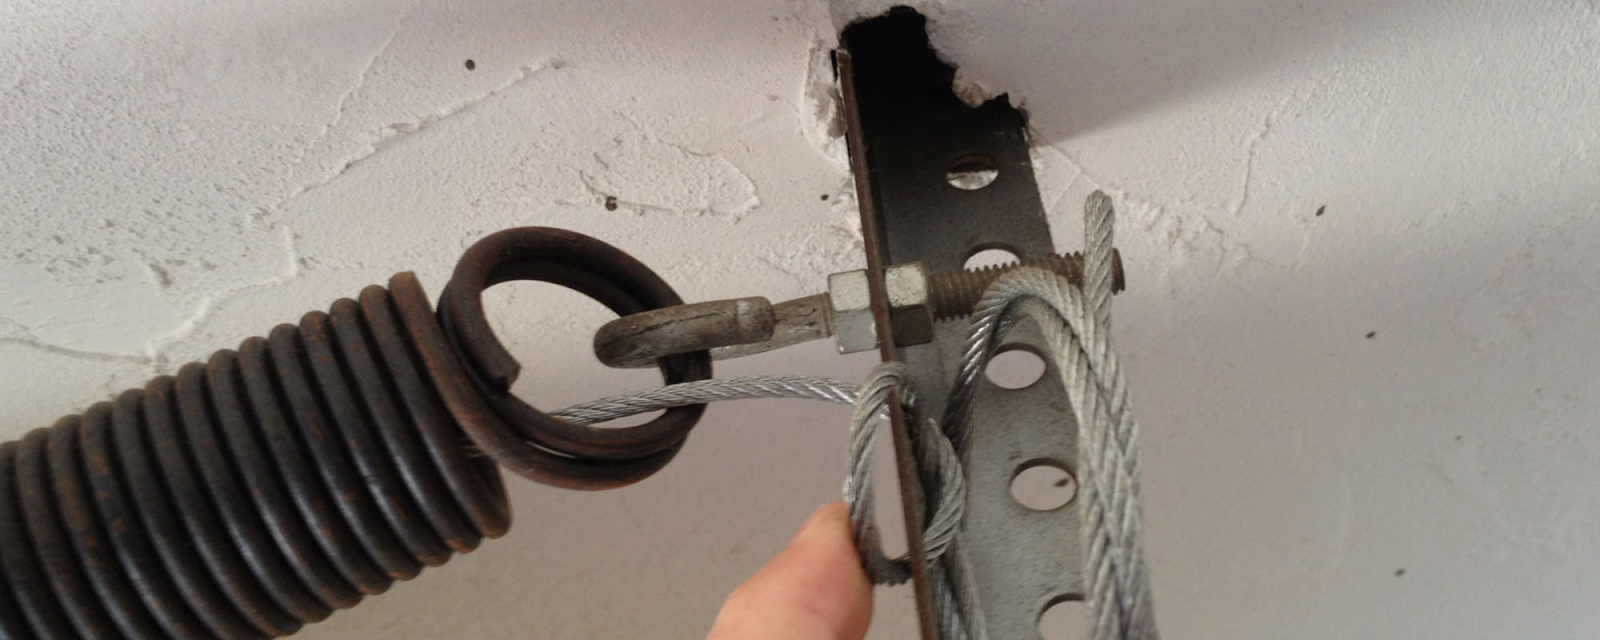
Remove Old Cable: Disconnect the old cable from the bottom bracket and the drum. Start by removing any fasteners or clips holding the cable in place at the bottom bracket, then unwind the cable from the drum at the end of the torsion spring shaft.
Install New Cable: Attach the new cable to the drum by inserting its end into the slot on the drum and winding it in the correct direction. Ensure the cable is tightly and properly seated. Secure the other end of the cable to the bottom bracket, ensuring it is firmly attached and aligned correctly.
Rewind Springs: Carefully rewind the torsion springs to the correct tension using the winding bars. Follow the same number of turns you noted to restore the spring’s tension to its original state. This step is crucial for the door’s proper operation.
Test the Door: Reconnect the garage door opener and test the door’s operation. Open and close the door several times to ensure it moves smoothly and the new cable functions correctly.
Replacing Extension Spring Lifting Cables
Disconnect the Opener: Unplug the garage door opener to prevent accidental activation and ensure safety while you work on the door.
Secure the Door: Clamp the door to prevent movement. Use C-clamps or locking pliers to secure the door on the tracks just below the bottom rollers, keeping it stable and immobile.
Release Tension: Carefully disconnect the extension springs. Use pliers to remove the springs from their hooks or brackets, allowing the tension to be safely released. Be cautious during this step to avoid sudden releases that could cause injury.
Remove Old Cable: Detach the old cable from the door and the pulley system. Remove any fasteners or clips securing the cable to the door, and unthread the cable from the pulleys.
Install New Cable: Attach the new cable, ensuring it is properly threaded through the pulleys. To maintain the door’s correct operation, follow the same path as the old cable. Secure the cable to the door’s attachment points.
Reconnect Springs: Reattach the extension springs, ensuring they are properly tensioned. Hook the springs back into their brackets or hooks and adjust the tension as necessary to ensure balanced operation.
Test the Door: Reconnect the garage door opener and test the door. Operate the door several times to ensure it moves smoothly and the new cable functions correctly.
Installing the Safety Cable on an Extension Spring

Disconnect the Opener: Unplug the garage door opener to prevent accidental activation. This step ensures your safety by disabling the door’s automatic operation.
Secure the Door: Clamp the door to prevent movement. Use C-clamps or locking pliers to secure the door on the tracks below the bottom rollers, keeping it stable and preventing any movement.
Attach Safety Cable: Thread the safety cable through the extension spring and secure it to the brackets. The safety cable should run through the center of the spring, and both ends should be securely attached to the front and rear brackets on the horizontal track. This cable acts as a safety measure in case the spring breaks.
Test Installation: Ensure the safety cable is installed correctly and provides an additional safety measure in case of spring failure. Check that the cable does not interfere with the regular operation of the extension spring and that it is taut but not overly tight.
FAQs
Can garage door cables be replaced?
Yes, garage door cables can be replaced. It’s important to follow safety precautions and consider professional help due to the tension involved in the cables. If you’re comfortable with DIY projects, make sure to use the correct tools and replacement parts specific to your garage door model.
How do you install a garage door cable?
To install a garage door cable, first, disconnect the power and release the tension from the springs. Remove the old cables and attach the new ones to the bottom bracket and the drum. Ensure they are properly aligned and tensioned. It’s recommended to consult the garage door manual or a professional for detailed instructions.
How do I know if my garage door cable is broken?
Signs of a broken garage door cable include the door not opening or closing properly, visible fraying or snapping of the cable, and the door hanging at an angle. If you notice any of these signs, inspect the cables and replace them if necessary to avoid further damage.
What type of cable is used for garage doors?
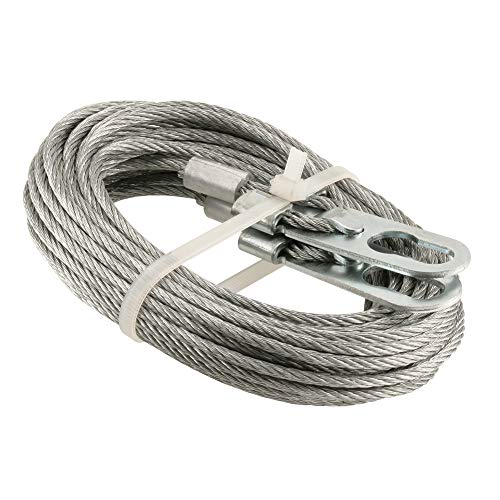
New garage doors typically use torsion or extension spring cables made of steel. Torsion cables are used with torsion springs, while extension cables work with extension springs. These cables are designed to handle high tension and ensure the smooth operation of the garage door.
Are garage door cables standard size?
Garage door cables are not one-size-fits-all. They come in various lengths and thicknesses to match different door sizes and spring systems. When replacing cables, it’s essential to use the correct size specified for your garage door model to ensure proper functionality and safety.
Final Thoughts
Replacing garage door cables is crucial for maintaining the safety and functionality of your garage door. Understanding each component’s process and importance helps you make informed decisions. Safety should always be your top priority; wear protective gear and secure the door properly. Consider your skill level before deciding between a DIY approach or hiring a professional. While DIY can save money, professionals ensure the job is done safely and correctly. Regular maintenance, such as inspecting cables for wear and lubricating moving parts, can prevent issues. Investing in quality materials will enhance durability. When in doubt, seek professional assistance to avoid risks and ensure proper garage door repair.
End Note
Thank you for reading our guide on replacing garage door cables. For professional help, Lopez Garage Door Services in Katy, TX, is here for you. Explore our Quality Services and garage doors. Learn about us on our About Us page and get useful tips from our blog. Check out our gallery to see our work. If you have any questions or need assistance, please contact us.
Lopez Garage Door Services is dedicated to providing exceptional service and ensuring your garage door operates safely and smoothly. Visit our website to learn more and schedule your service today. Let us help you keep your garage door in peak condition.